Imagine this scenario: It's a busy morning, and you're in the middle of your morning routine when suddenly, your trusty refrigerator starts making a mysterious noise you’ve never heard before. Panic sets in as you realize that your overnight oats or lunch may be at risk. In moments like these, we all wish for a superhero to come to our aid and save the day. Fear not! You have the power within you to become your household's hero, armed with the knowledge to troubleshoot most of the common major appliance issues that plague our homes. From finicky or not working dishwashers to temperamental or leaking washing machines, this blog gets to the bottom of these secrets and mysteries to keep your household running smoothly. Get ready to learn the world of appliance troubleshooting and emerge the hero you're home deserves!
In this blog, we’re going to dive into several issues that we hear on a daily basis and what we tell our clients to check before sending out a pro.
Washing machines
Envision a time when automatic washers didn't exist and cleaning your clothes meant using a barrel or even a rock at the river. Frankly, I don't want to imagine that either. The reality is, clean clothes are an essential requirement in our modern era. Visiting a Laundromat is often not feasible for many individuals, and hand-washing clothes in a sink would become a time-consuming occupation. Now, let's explore the common issues we frequently encounter at our shop.

1) Not draining water
This problem can manifest itself in various codes or indications that offer clues about the underlying issue. When faced with a drainage problem, our initial assessment involves inspecting the amount of residual detergent inside the tub. If we observe lingering soap suds, our focus shifts to investigating potential over-sudsing, indicated by an excessive amount of bubbles. Excessive soap in the water makes it challenging for the water pump to effectively expel the water from the machine. Instead, the pump churns the soap into a foam that doesn't drain properly.
If you suspect over-sudsing, a simple solution is to add a few tablespoons of cooking oil, such as olive or vegetable oil, to reduce the suds and facilitate quicker water drainage.
Once you've determined that soap isn't the cause of the issue, the next step involves examining the pump itself. In a front-loading washing machine with an access panel below the door, you can easily expose the pump by removing the 3 or 4 screws securing the lower panel. The pump will have several hoses and wires attached to it. CAUTION: There is a risk of flooding. With this type of pump, you can unscrew the side to reveal a filter that may have accumulated debris over the years. Be prepared for any water that may come out. Clearing the debris and re-installing the filter should resolve the problem.
If you've gone through these steps and are still experiencing issues, it is likely that a component needs replacement, and it is advisable to seek professional assistance.
2) Not filling with water.
When a washer fails to fill, there are typically three potential problems to consider. The first and most common issue for homeowners to check is the incoming water pressure. To assess this, follow these steps:
- Turn off the water valve supplying water to the washer.
- Unscrew the hose end connected to the washer, while keeping the hose attached to the house.
- Place the water hose in the washer's drain pipe and turn the water back on.
- Check the pressure of the water coming out of the hose. It should be strong enough to spray the wall across the room.
If the water pressure is good, the next step is to inspect the metal or plastic screens located on the washer. These screens can become blocked with dirt and grime, preventing water from passing through into the machine.
If both the water pressure and screens are fine, there may be an issue with the valve that controls water flow, or the safety switch known as the pressure switch might not be allowing water to pass through the valve.
Clothes Dryers
While the dryer may not be as crucial as its washing counterpart, nobody wants to hang their clothes outside only for birds to land on them. It results in a crunchy texture, takes an eternity to dry, and when it's snowing, it feels like it takes months for your clothes to be ready. Well, it's a humorous exaggeration, but you get the idea. Despite having fewer components that can break, clothes dryers incorporate numerous safety features to prevent accidental house fires in case of malfunctions.
Now, let's delve into the common issues we receive calls about almost every day and explore troubleshooting steps you, as a consumer, can undertake before resorting to hiring a professional.

3) Taking Too Long To Dry
When your dryer fails to dry efficiently, it can have various costly implications. Dryers are notorious for consuming significant amounts of electricity, often surpassing other appliances in your household. If you find yourself restarting the cycle multiple times because your clothes aren't drying, you're not only using two or three times more electricity but also wearing out the parts of the dryer faster. Additionally, it's wasting your valuable time that could be spent on Netflix or other activities.
If you're facing this issue, let's go over some simple checks you can perform. Firstly, examine the lint filter. Dryers rely on proper airflow for effective operation. If the airflow is restricted due to a clogged lint filter, the heater won't function efficiently, leading to significantly longer drying times. Clean the lint filter thoroughly to ensure it's not impeding airflow.
If the lint filter is clean and the issue persists, it's time to venture outside and locate the vent that exhausts the dryer air from your house. Typically, you'll find either a grate or flapper covering the vent outside. With the dryer running, feel around the opening of the vent. You should feel a substantial amount of air flowing from the vent. However, if there is minimal to no air coming out, it indicates a restriction either in the vent pipe directly behind the dryer or inside the wall. You can purchase an extendable lint brush to scrub the inside of your vent, or alternatively, seek assistance from a professional. It is crucial to address a lint restriction promptly to avoid the risk of a fire inside the vent.
By performing these checks and addressing any lint restrictions, you can improve the efficiency of your dryer and avoid potential hazards.
4) Dryer Too Hot
We’ve all experienced it. Your favorite shirt ruined in the dryer because it over dried or got burnt against the hot metal panel in the back. Of course, that band doesn’t play anymore either. Over drying is usually worse than under drying because it means your clothes are ruined instead of just a little damp. Let’s go over some common reasons why your dryer could be over drying your clothes.
One of the first things to check is the temperature setting. Most people have gotten away with using 1 cycle on their dryer and it’s not really the way it’s supposed to be. If you checked the tag on your clothes for the drying instructions, it would say to tumble dry LOW. This is because the materials used to make shirts can not withstand the heat generated in a HIGH heat cycle. Usually, a dryer runs at about 180-210 degrees F on a high heat cycle, depending on what dryer you have. This is good for towels, rugs, jeans and heavy material items. A t-shirt can probably get away with these high heats, but it isn’t extending the life of your shirt at all.
If you’ve determined that the temperature setting is correct, the next thing to do would be to check the vent pipe behind the dryer. If this is crushed and the safeties inside the dryer aren’t working right, this would cause the dryer to heat up uncontrollably. If you’ve noticed that your vent is crushed, it’s best to go to a local appliance store and get the correct length of venting needed to properly install your dryer again. Making sure that you have proper airflow going to the outside of your house is ideal for maintaining a healthy, safe dryer.
Dishwashers
In my household, the dishwasher is one of the most loved items. Due to our large family, we use a bunch of dishes. When it’s busy or needs to be emptied and there are dishes to go in behind it, it brings our kitchen to a standstill. Even more important, is making sure it’s operating correctly so you have properly washed and sanitized dishes, because no one wants to use the bowl with lettuce attached to it. Let’s check out some common issues with dishwashers and what you can do to minimize the amount of time you spend hand washing dishes.
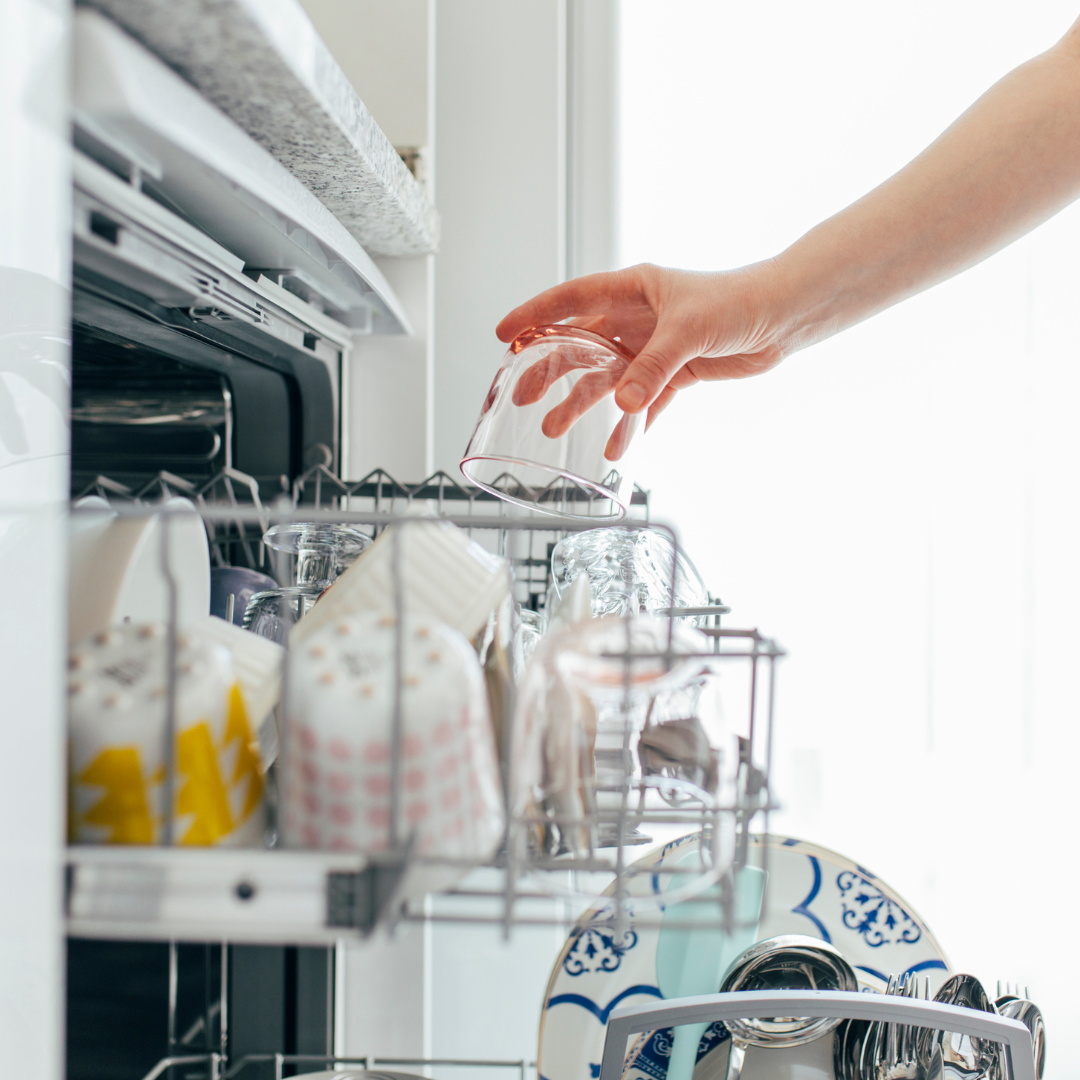
5) Not Washing Well
Ah, the persistent issue of dried, crusty food residue on our dishes. We've all encountered it, running the dishwasher again and again only to have the same disappointing outcome. After a week of finding a quarter of your dishes still dirty after a cycle, you realize it's time to take action. But what can you do?
Around four years ago, dishwashers introduced a filtration system to remove food particles from the interior. However, most retailers failed to inform customers about the importance of cleaning this filter, which can wreak havoc on your dishes. If you're experiencing poor washing results, let's locate and clean that filter. Pull out the bottom rack of your dishwasher and inspect the bottom area. Typically, there is a round filter that twists out for cleaning. Remove this filter, along with any other attached mesh filters. Use soap to clean the fine mesh thoroughly because even if it appears clean, there might be grime obstructing the small holes, preventing water from passing through effectively. Dirty filters hinder the dishwasher's ability to circulate water strongly enough to clean your dishes.
If your filter is clean or you're fortunate enough not to have one, another effective option is to run a long, hot cycle with powdered Tang, the fruit drink famously taken to space. Tang contains citric acid, which works wonders in removing built-up calcium or lime scale and breaking down leftover food particles that might be lurking in your dishwasher. Add a few tablespoons of Tang to the bottom of your dishwasher and fill the main and pre-wash areas of the soap dispenser. As the dishwasher runs, the solution will spread throughout, breaking down substances that can cause dirty or cloudy dishes. After approximately 15 minutes, consider opening the door or pausing the cycle for a brief soak before resuming.
If these solutions don't resolve the issue, it may be time to call a technician who can further investigate and identify any underlying problems with your dishwasher.
6) Not Draining The Water Out
Having your dishwasher filled with dirty, nasty water is one of the worst things imaginable. If you have that water sit around for a while, it will start a science experiment in your dishwasher that will inevitably make your kitchen start to smell funky. Luckily, there are a few things to check before hiring out a pro.
First off, did you just have your garbage disposal replaced? If the person installing the disposal doesn’t take out the plug that you attach your dishwasher to, your water will have nowhere to go besides back inside the unit. This happens so often, that it is the first thing I ask someone when they are having an issue with water not draining.
Another thing to check would be the air gap, which is the thing on top of the sink that spills water out when your dishwasher is draining into a restriction. The air gap has a tube that goes to your disposal or into your sink piping. Food can get lodged into this tube creating a blockage. To clean this hose, either remove the hose entirely and blow through it, yuck, or take the air gap apart from the top and run a brush down into the sink. This will clean out any junk and get your water flowing correctly again.
Refrigerators
Refrigerators, a true modern marvel. Without it, we would still be eating pemmican and foraging for our foods. Refrigeration has helped us eat safer because our food is fresh and maintained at a good temperature. But when this modern marvel goes out, it spells disaster for our waistlines and wallets. Eating out has become a luxury with the increase in food costs and it never has been very healthy. Cooking at home with fresh ingredients is just the smart choice. Let’s go over some common issues that plague refrigerator owners.

7) Cleaning The Coil
Cleaning the coil. What the heck does that even mean? Even though cleaning the coil isn’t an issue per say, it can and will cause a lot of expensive issues that can cause you to lose food.
First off, the coil is the common term for the condenser. Unsure of what the condenser exactly is? Check out our glossary of terms here, https://www.sargentsoutlet.com/p/refrigerator-glossary-of-terms. The condenser is below the refrigerator and is responsible for cooling the refrigerant as it does the refrigeration cycle. When dirt or lint build up on this coil, it loses its ability to cool correctly. This makes the refrigerator run warmer, as well as heating up the compressor and connecting wires and tubes that supply electricity and water throughout the unit. If these wires or tubes heat up, they can break causing an electrical problem, or a hose can break causing a leaking problem. Both of these issues can cause major issues in your house or for your flooring.
The best way to keep the condenser clean is too regularly, once a year, clean it with your vacuum. This is done by opening the doors and removing the grill or toe kick. This will expose black tubes that will usually be warm. Using your vacuum often on these coils ensures it doesn’t impact inside the coil, which makes cleaning it inside the house almost impossible. There are also brushes specific for this job, allowing you to scrub stuck lint off the coil.
8) Water Leaking Mysteriously
One of the creepiest things to happen to me in the middle of the night is stepping in ice cold water while trying to fill up my water glass. You’re unsure of where it’s coming from, it’s cold and it’s the middle of the night. Did someone drop an ice cube? Odds are, actually, that the defrost drain is clogged. In the normal operation of your refrigeration, moisture is accumulated on the other coil inside the refrigerator, the evaporator coil. This coil is the part that actually gets cold and it freezes water to it constantly. Every 8 hours that your refrigerator is cooling, it initiates a defrost cycle to melt this frost away. The water from this process travels down, or is supposed to at least, a tube that evaporates from below the unit. When this tube becomes clogged, the water has no where to go besides on to the floor of the refrigerator and eventually, on to your kitchen floor.
The easiest way to diagnose this is to find water in the bottom of the refrigerator, or ice in the bottom of the freezer. If you have water or ice, you will want to locate the air fins located on the back panel, low in the freezer. Inspect that area for ice. If ice is present, your defrost drain is most likely clogged. To clean it, you’ll need to find the blockage. First off, check the back of the unit by the compressor. This area is covered by a panel you will have to remove. You will need to locate the pan that water sits in and then locate the tube that deposits water into this pan. In many cases, there is a “duck bill” that covers the tube. This can get dirty and gum up not allowing water to pass. You’ll want to clean this valve and reinstall it. Next, you’ll need to clean the ice inside that we located earlier. Below this ice, you’ll find a hole. Be careful not to touch the shiny aluminum as it is very fragile. When the defrost hole has been located, you’ll want to flush it with hot water, usually from a turkey baster. You’ll know it’s clean when water flows through without pooling up inside the defrosting area.
If you repair this and it continues to happen, there are heaters that can be installed, but this is a last ditch repair and not to be done the first time.
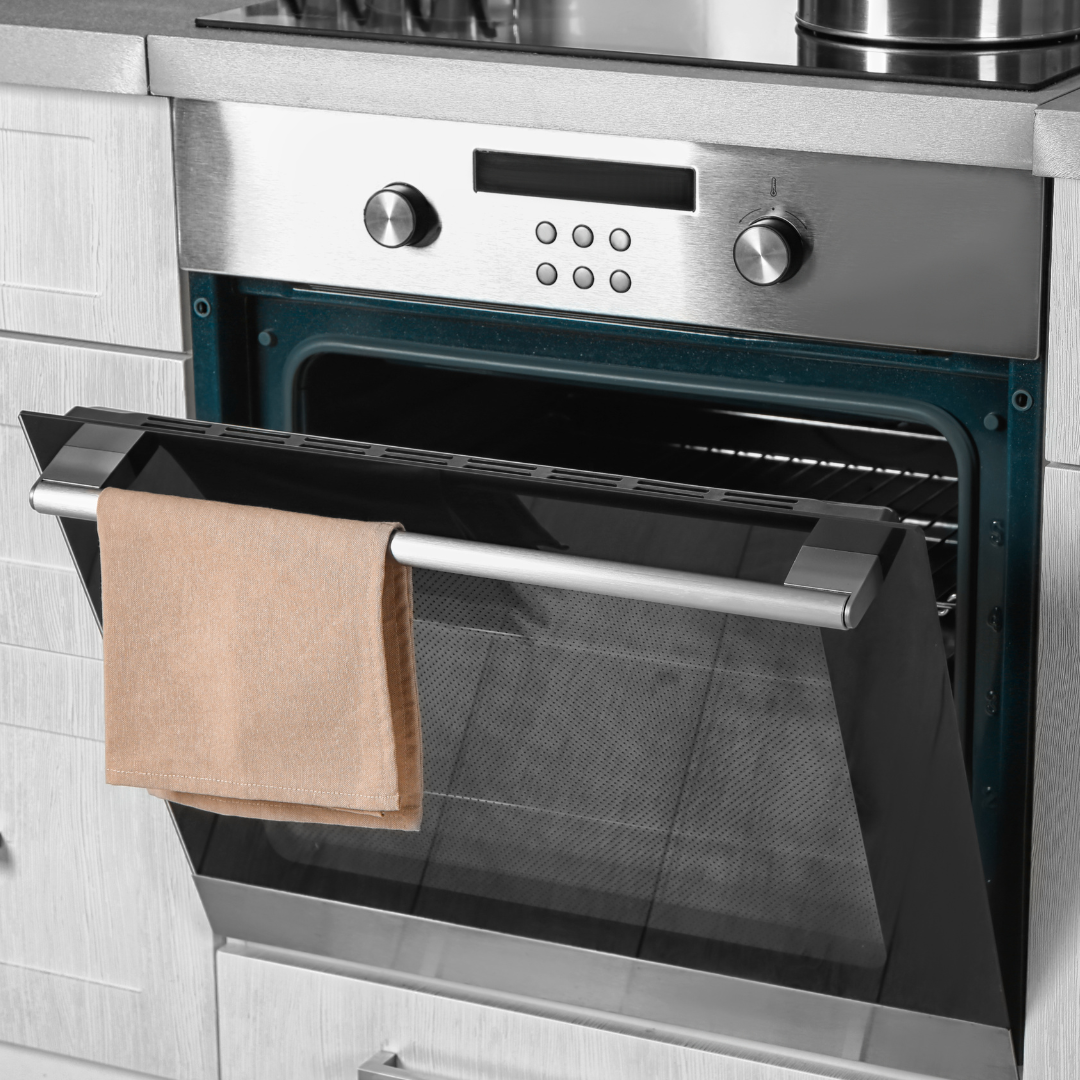
Cooking: Ranges and Ovens
It's true that most people prefer home-cooked meals. There's a certain satisfaction that comes from food prepared with love in the comfort of one's own home. Homemade meatballs, tacos, soups, and sauces are just a few examples of culinary delights that fulfill our cravings. However, when you're left with microwavable meals or cold items, that special magic seems to fade away. Now, let's explore some common issues and steps you can take before resorting to calling a technician.
9) Gas Igniter Won’t Light
Dealing with a gas stove that keeps clicking without igniting can be incredibly frustrating. While you can manually light it with a lighter or match, that's not what you paid for. If you can hear the igniter sparking but don't see a flame, there's a potential solution we can try.
In many cases, a small amount of water may have found its way into the bottom pan of the burners, causing electrical issues. If you suspect water might be contributing to the problem, the best approach is to manually light all the burners and let them stay on for a while, preferably up to an hour. This allows the trapped water below the burners to evaporate and dries out the connections, improving the ignition process.
If this method doesn't resolve the issue, it's worth cleaning the caps that go onto the burners. The igniter relies on an electrical connection with the burner assembly, and if there is grease or grime buildup on the burner, the igniter may struggle to find a suitable surface to spark.
If neither of these steps resolves the problem, it's recommended to contact a technician who can diagnose the issue further. They will be able to determine whether the problem lies with the igniter probe itself or the spark module, and take the appropriate steps to fix it.
By attempting these troubleshooting methods, you may be able to address the clicking issue and restore proper ignition to your gas stove.
10) Cleaning The Always Dirty Glass Cooktop
Glass cooktops have usually been marketed as a cleaner option then coil or gas because of the smoothness of the surface. If that’s true, why does it always look so dirty and grimy? I’m going to lose some friends here, but it’s your cooking habits. As with many things, an ounce of prevention is worth a pound of cure. If you clean up your mess right as it happens, you don’t have to worry about deep cleaning as often. The issue is the surface is usually very hot because you were cooking. How do you combat this? The answer is a metal, razor blade scraper with square blades. These work magic as they are sharp, metal and cheap to maintain. I keep it right next to my stove. The trick is to keep the blades new so they don’t damage the top when dull.
Once a month or so, you can do a deep clean, using a cooktop cleaning paste to soak the top in, and your scraper to scrape the dry paste and debris off. If you keep up on these 2 steps, your glass cooktop will look brand new 5 or 10 years in the future.
Conclusion
Congratulations on acquiring the essential skills for appliance troubleshooting! With your newfound knowledge, you are now equipped to tackle various household challenges that may arise. As we conclude this blog, it's important to remember that you are not alone on this journey. We have embarked on this exploration of common appliance issues together, empowering ourselves with valuable knowledge along the way. We have emerged smarter and more capable than before.
However, this is merely the start of our adventures together. Stay tuned for our upcoming blog, where we will delve into even more fascinating and vital topics that will transform you into a true household superhero. The journey continues, and we're excited to have you on board.